| 일 | 월 | 화 | 수 | 목 | 금 | 토 |
|---|---|---|---|---|---|---|
| 1 | 2 | 3 | ||||
| 4 | 5 | 6 | 7 | 8 | 9 | 10 |
| 11 | 12 | 13 | 14 | 15 | 16 | 17 |
| 18 | 19 | 20 | 21 | 22 | 23 | 24 |
| 25 | 26 | 27 | 28 | 29 | 30 | 31 |
- 리액트 훅
- react firebase
- JavaScript
- 프로그래머스 완전탐색
- 자바스크립트
- design pattern
- 프로그래머스 자바
- useState
- codesandbox
- 프로그래머스
- useEffect
- 데이터모델링과마이닝
- 코딩테스트 고득점 Kit 완전탐색
- Java
- NextJS
- websocket
- 자바
- 코딩테스트 고득점 Kit
- react
- 자바 공부
- 디자인 패턴
- react hook
- 컴퓨터 네트워크
- 코틀린
- 프로그래밍 언어론
- vanillaJS
- 장고
- React JS
- 백준
- 리액트
- Today
- Total
기록하는 개발자
[ HTML, Css 입문 ] HTML 실습-자기소개 페이지 만들기 본문
우리 학교 멋사에서도 올해부터는 웹으로 프로젝트를 진행하기로 했고 오늘 첫 실습 강의가 진행됐다:D
[ 실습 1 ]

<!DOCTYPE html>
<html.lang="ko">
<head>
    <title>mingmeng030</title>
    <meta charset="utf-8">
    <meta name="author" content="김어진">
    <meta name="description" content="MyHtml">
    <link rel="stylesheet" type="text/css" href="./style.css">
    <style>
        h3{
            color:orange;
        }
    </style>
</head>
<body>
<div class="MyProfile" align="center">
    <h1 align="center">김어진의 자기소개</h1>
    <div class="ProfilePicture">
        <h3>프로필 사진</h3>
        <img src="https://avatars0.githubusercontent.com/u/52485293?s=460&u=4988b1661a33011c5abada6dd60bc6d7784f4de8&v=4" width="200" height="200">
    </div>
    <br>

    <div class="MyInfo" align="center">
        <h3>내 정보</h3>
        <span><b>상명대학교</b></span>
        <span><b>컴퓨터과학과</b></span>
        <span><b>201810911</b></span>
        <span><b>김어진</b></span>
    </div>
    <br><br>

    <div class="introduce">
        <h3>자기소개</h3>
        <i>안녕하세요 저는 멋쟁이 사자처럼 8기 김어진 입니다.</i>
    </div>
    <br><br>
.MyProfile{
background-color:lightblue;
}
.introduce{
background: white;
margin : 60px;
}- background-color를 통해 배경색 변경
- introduce class에 포함된 단락(div)의 배경만 white로 지정
- margin을 통해 좌우에 60px만큼 공간 확보(외부 공간)

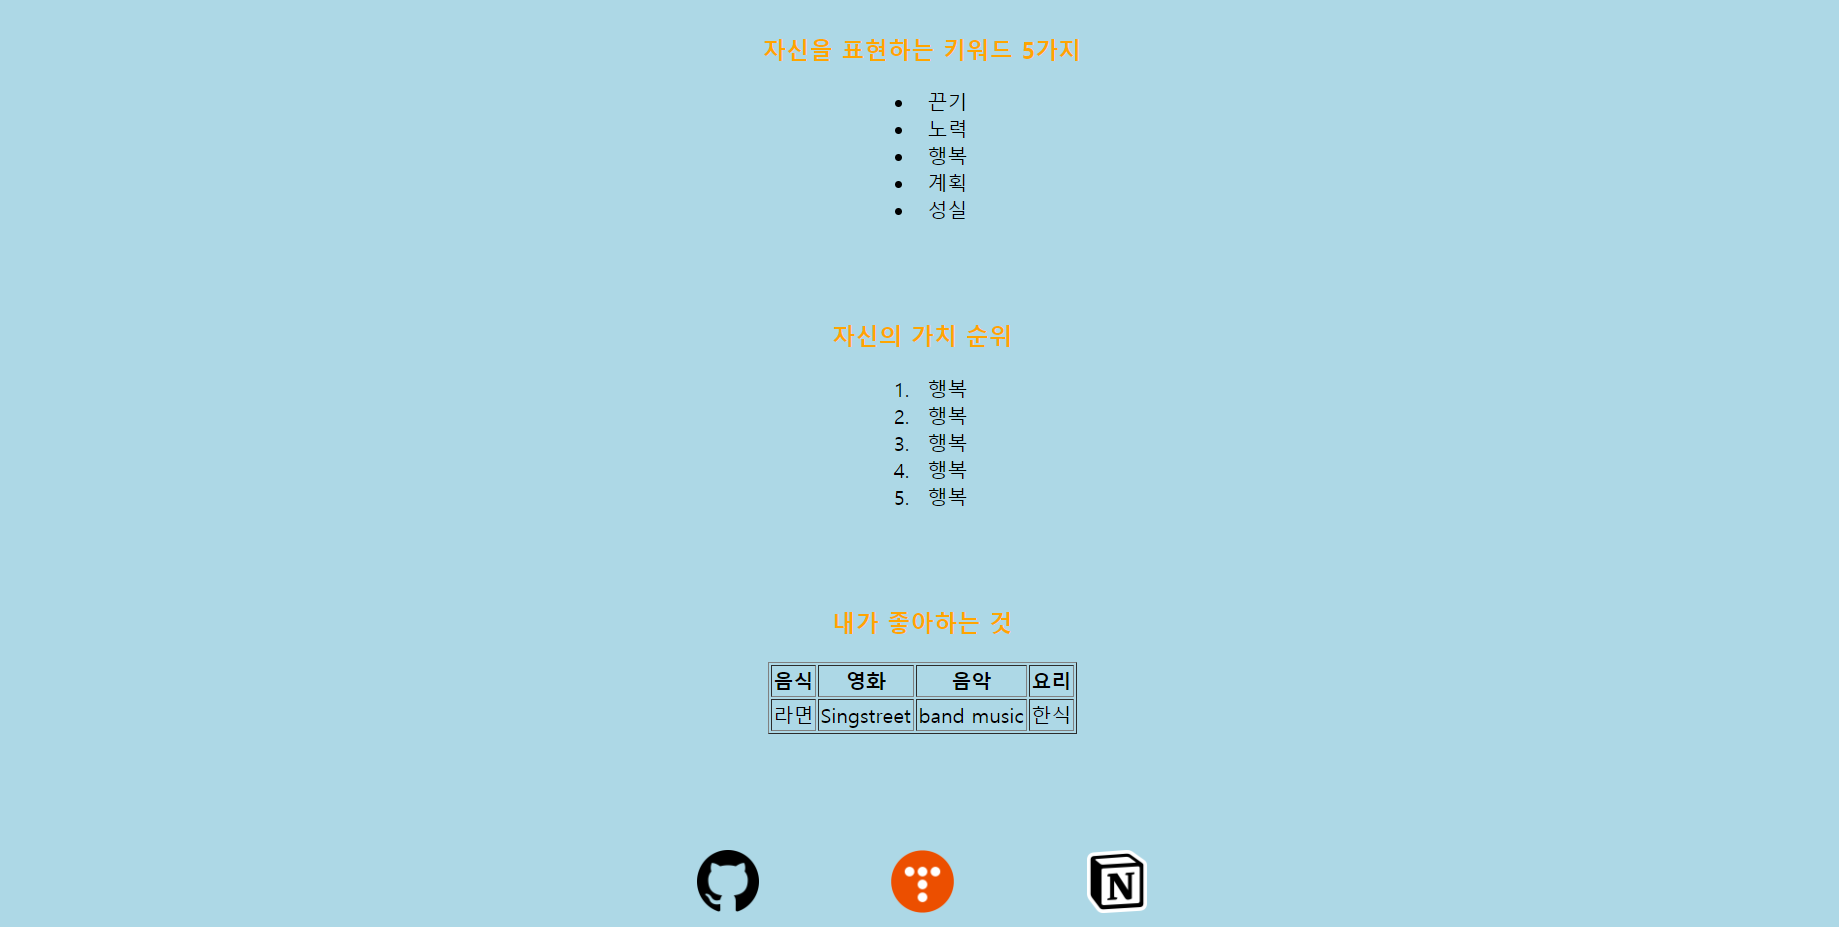
  <div class="keyword">
        <h3>자신을 표현하는 키워드 5가지</h3>
        <ul class="mykeyword">  <!--Unordered List-->
            <li>끈기</li>
            <li>노력</li>
            <li>행복</li>
            <li>계획</li>
            <li>성실</li>
        </ul>
    </div>
    <br><br>

    <div class="value">
        <h3>자신의 가치 순위</h3>
        <ol class="myvalue"> <!--Ordered List-->
            <li>행복</li>
            <li>행복</li>
            <li>행복</li>
            <li>행복</li>
            <li>행복</li>
        </ol>
    </div>
    <br><br>

    <div class="favorite">
        <h3>내가 좋아하는 것</h3>
        <table border="1">
            <thead>
                <tr>
                    <th>음식</th>
                    <th>영화</th>
                    <th>음악</th>
                    <th>요리</th>
                </tr>
            </thead>
            <tbody>
                <tr>
                    <td>라면</td>
                    <td>Singstreet</td>
                    <td>band music</td>
                    <td>한식</td>
                </tr>
            </tbody>
        </table>
    </div>
    <br><br>

    <div class="MyLink">
        <a href="https://github.com/mingmeng030">
            <img class=link src="git.png" width="50" height="50">
        </a>
        <a href="https://mingmeng030.tistory.com/">
            <img class=link src="tstory.png" width="50" height="50">
        </a>
        <a href="https://www.notion.so/Mingtion-c66934e3867b492dbd04b693c9e7e1d4">
            <img class=link src="notion.png" width="50" height="50">
        </a>
        <br><br>
    </div>
</div>
.mykeyword{
width: 50px;
}
.myvalue{
width: 50px;
}
.link{
padding:50px;
}- ul을 통해 unordered list를 생성하여 키워드 나열
- ol을 통해 ordered list를 생성하여 순위별 항목 나열
- table을 생성하여 thead, tr, th를 이용해 표 만들기
- href를 통해 링크에 이미지를 연결→이미지 클릭 시 해당 페이지로
- 이미지마다 'link'라는 class를 지정하여 padding 50px 공간 확보(내부 공간)
[ 실습 2 ]

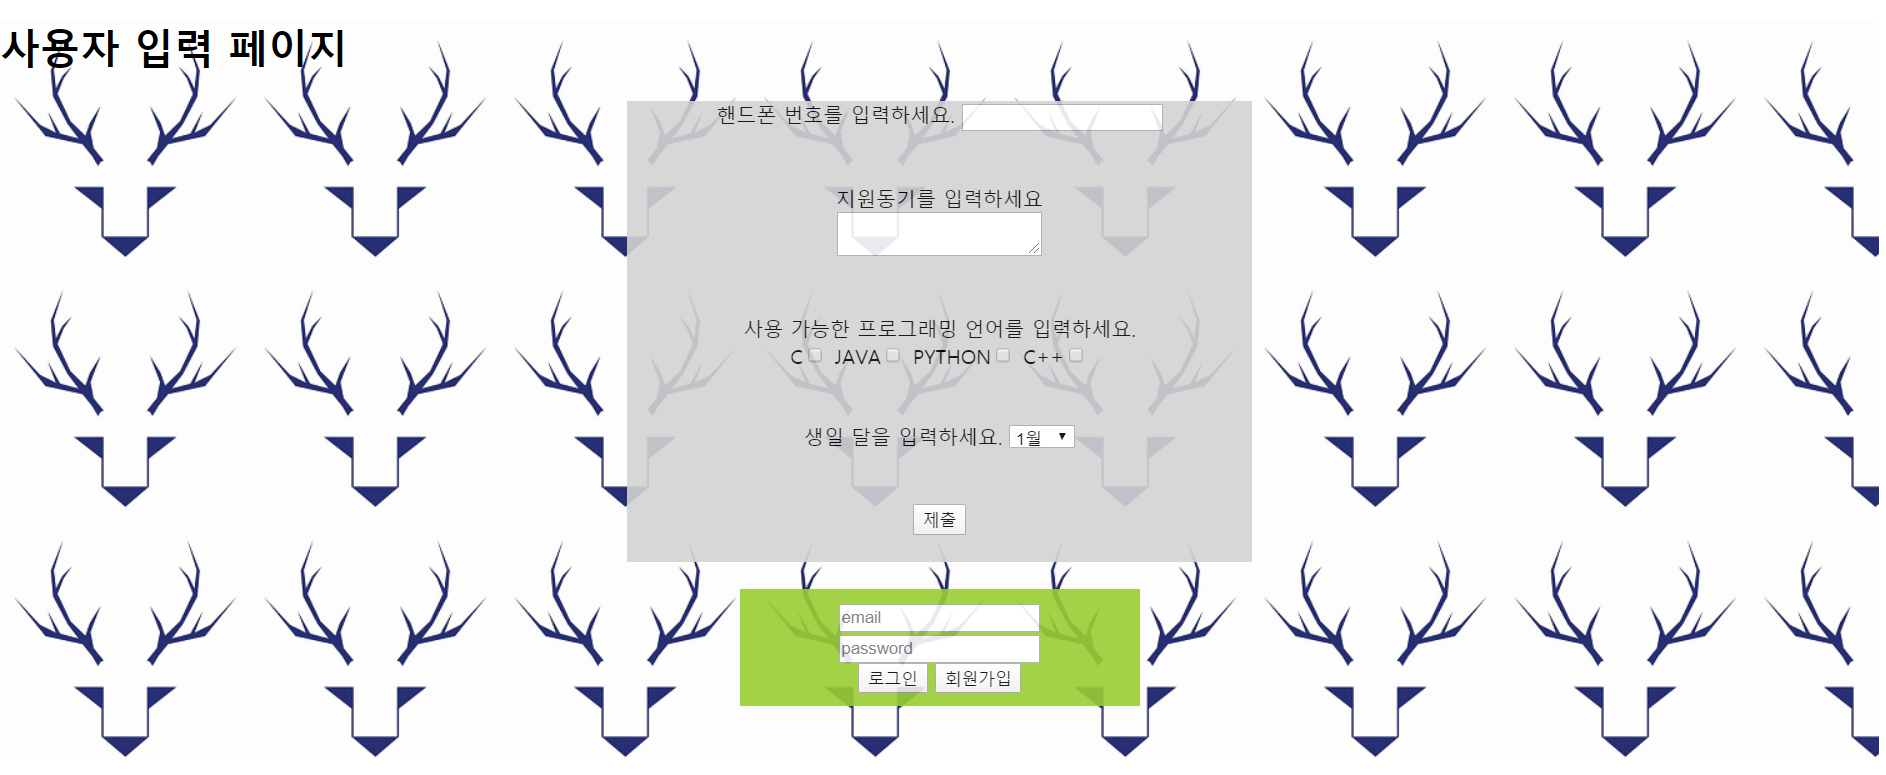
<div class="inputService" align="center">
<h1 align="left">사용자 입력 페이지</h1>
<div class="MyInput">
<div class="textInput">
핸드폰 번호를 입력하세요.
<input type="text">
</div>
<br><br>
<div class="textAreaInput">
지원동기를 입력하세요<br>
<textarea></textarea>
</div>
<br><br>
<div class="checkbox">
사용 가능한 프로그래밍 언어를 입력하세요.<br>
C<input type="checkbox">
JAVA<input type="checkbox">
PYTHON<input type="checkbox">
C++<input type="checkbox"><br>
</div>
<br><br>
<div class="select">
생일 달을 입력하세요.
<select>
<option>1월</option>
<option>2월</option>
<option>3월</option>
<option>4월</option>
<option>5월</option>
<option>6월</option>
<option>7월</option>
<option>8월</option>
<option>9월</option>
<option>10월</option>
<option>11월</option>
<option>12월</option>
</select>
</div>
<br><br>
<button>제출</button>
<br><br>
</div>
<br>
<form class="loginForm">
<input type="email" placeholder="email"><br>
<input type="password" placeholder="password"><br>
<button>로그인</button>
<button>회원가입</button>
</form>
<br><br>
</div>.inputService{
background-image : url("smu.png");
}
.MyInput{
width: 500px;
background-color: lightgray;
opacity: .9;
}
.loginForm{
background-color: yellowgreen;
width:300px;
padding: 10px;
opacity: .9;
}opacity : 투명도로 1일 때 기본이고 0.9,0.8 처럼 아래로 내려갈 수록 투명도가 줄어든다.
[ 실습 3 ]

- 건틀릿 이미지를 클릭하면 세 히어로가 사라진다
<body>
    <div class="Avengers" align="center">
        <h3>타노스 건틀렛 핑거스냅</h3>
        <img id=guntlet src="guntlet.png" width="300" height="300"><br>
        <img id=ironman src="ironman.png" width="200" height="300">
        <img id=hulk src="hulk.png" width="200" height="300">
        <img id=groot src="https://lh3.googleusercontent.com/proxy/K3HFWJW76OOT0K_DbC7XO01kvjzd3ARkzMFysFe_-rVjKvDJzDxhcxvmNKuRt1oECUhIQRznGZ9Ap56PrudxeC5JDquremCusJlbRpml5Es269U" width="300" height="300"><br>
    </div>

    <script
      src="https://code.jquery.com/jquery-3.5.0.js"
      integrity="sha256-r/AaFHrszJtwpe+tHyNi/XCfMxYpbsRg2Uqn0x3s2zc="
      crossorigin="anonymous"></script>
      <script src="./index.js"></script>

</body>
$(document).ready(function(){
$("#guntlet").click(function(){
$("#ironman").fadeToggle();
$("#hulk").fadeToggle("slow");
$("#groot").fadeToggle(3000);
});
});-JQuery 홈페이지의 fadeToggle 코드를 이용한 javascript
(body의 마지막 부분에 위 코드를 복사하고 원하는 기능의 함수를 그 아래 script 태그를 통해 붙이거나 js 파일을 생성하여 사용. 상세 설명은 아래 타 블로그 링크 참조)
https://www.jbfactory.net/10527
티스토리 강좌 / jQuery 사용하는 방법
티스토리에서 jQuery를 사용하는 방법은 두 가지가 있습니다. jQuery를 새로 연결하는 방법 원하는 버전의 jQuery를 사용하는 방법입니다. jQuery를 연결하는 위치 HTML의 어떤 위치에 연결해도 작동하지만, 보통 위에 jQuery를 연결합니다. CDN을 이용하는 경우 HTML의 위에 다음 코드를 추가합니다.
'Web' 카테고리의 다른 글
| rest API란? (0) | 2022.08.05 |
|---|---|
| HTML 콘텐츠 구분 정리 및 실습 (0) | 2020.05.07 |
| HTML 블록레벨 요소, 인라인 요소 (0) | 2020.05.07 |
| CSS 가운데 정렬(margin auto조정) (0) | 2020.03.28 |
| 웹 공부를 시작한다. (0) | 2020.03.28 |


