| 일 | 월 | 화 | 수 | 목 | 금 | 토 |
|---|---|---|---|---|---|---|
| 1 | 2 | 3 | ||||
| 4 | 5 | 6 | 7 | 8 | 9 | 10 |
| 11 | 12 | 13 | 14 | 15 | 16 | 17 |
| 18 | 19 | 20 | 21 | 22 | 23 | 24 |
| 25 | 26 | 27 | 28 | 29 | 30 | 31 |
- vanillaJS
- react
- 백준
- 디자인 패턴
- 자바스크립트
- 코딩테스트 고득점 Kit 완전탐색
- 리액트
- 자바 공부
- 코딩테스트 고득점 Kit
- 프로그래밍 언어론
- useEffect
- NextJS
- 데이터모델링과마이닝
- react firebase
- 코틀린
- React JS
- 프로그래머스 자바
- codesandbox
- JavaScript
- 장고
- 자바
- 프로그래머스
- useState
- Java
- react hook
- 리액트 훅
- design pattern
- 프로그래머스 완전탐색
- 컴퓨터 네트워크
- websocket
- Today
- Total
기록하는 개발자
[vanillaJs] 프레임워크없이 SPA 만들기-1. 라우팅 설정하기 본문
폴더 구조
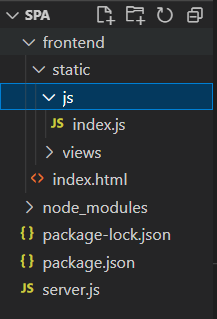
1. frontend 폴더 내부에 index.html 파일 생성 후 아래와 같이 구성
// index.html
<!DOCTYPE html>
<html lang="en">
  <head>
    <meta charset="UTF-8" />
    <meta http-equiv="X-UA-Compatible" content="IE=edge" />
    <meta name="viewport" content="width=device-width, initial-scale=1.0" />
    <title>SPA with no framework</title>
  </head>
  <body>
    <nav class="nav">
      <a href="/" class="nav__link" data-link>Home</a>
      <a href="/posts" class="nav__link" data-link>Posts</a>
      <a href="/settings" class="nav__link" data-link>Settings</a>
    </nav>
    <!-- js entry point -->
    <script type="module" src="/static/js/index.js"></script>
  </body>
</html>
- url 이동에 사용하게 될 a 링크들에 대하여 data-link 속성을 지정해준다.
+) data-* 속성 참고 글 (https://developer.mozilla.org/ko/docs/Learn/HTML/Howto/Use_data_attributes)
2. node.js project 생성 : Npm init -y
3. express 설치 : Npm i express
4. server.js 파일 root 폴더에 생성 후 아래와 같이 구성
const express = require("express");
const path = require("path");

const app = express();

// 경로에 대한 get 요청 시 index.html file을 send
app.get("/*", (req, res) => {
  res.sendFile(path.resolve("frontend", "index.html"));
});

app.listen(process.env.PORT || 5060, () => console.log("Server running..."));
5. vscode 터미널에 “node server.js"를 입력하면 server가 작동한다.
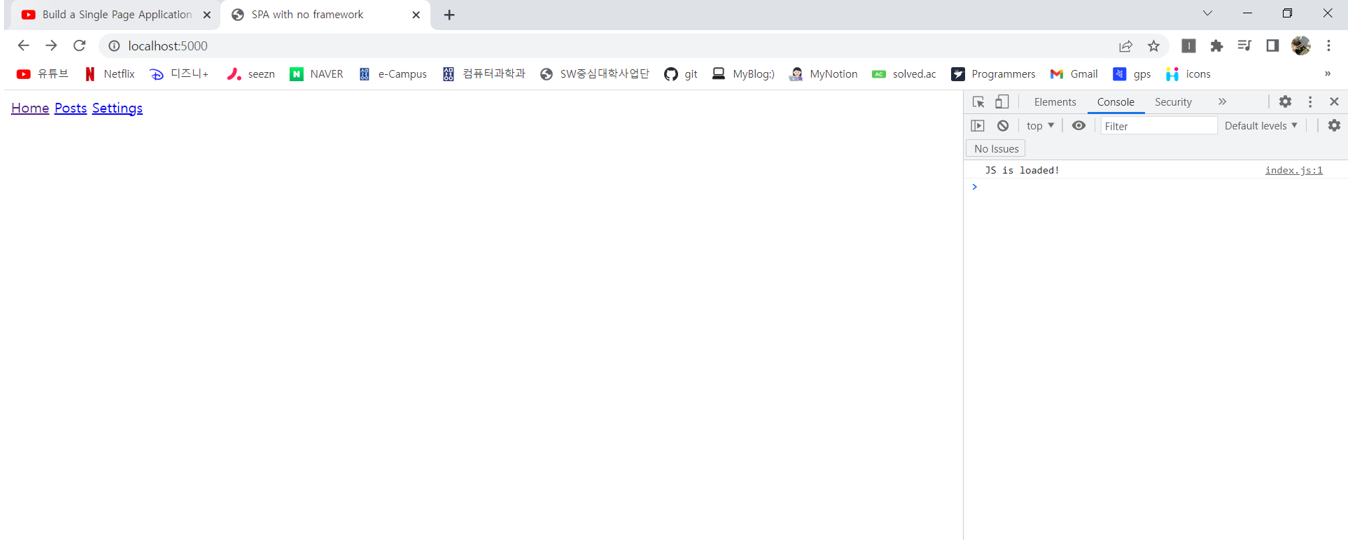
6. index.js에 router 함수 작성
const router = async () => {
  // 경로를 담는 배열 선언
const routes = [
    // 경로 객체들로 배열 초기화
    // / : root path
    { path: "/", view: () => console.log("viewing home") },
    { path: "/posts", view: () => console.log("viewing posts") },
    { path: "/settings", view: () => console.log("viewing settings") },
  ];

  const potentialMatches = routes.map((route) => {
    return {
      route: route,
      isMatch: location.pathname === route.path,
    };
});
};
// document가 load되면 router 함수를 실행시키는 event 추가
document.addEventListener("DOMContentLoaded", () => {
  router();
});
potentialMathches
- routes 배열을 순회하여 새로운 객체 배열을 만들어 반환한다.
# potentialMatches 객체 배열 내 요소
- route : routes내 배열 요소
- isMatch : routes내 배열 요소가 현재 location.pathname과의 동일한지의 여부(true/false)
❕ 현재 경로가 “/”, “/posts”, “/settings”인 경우에 각각 console창에 location.pathname을 확인해보면 routes 배열 내에서 path로 설정해준 이름이 잘 출력된다.

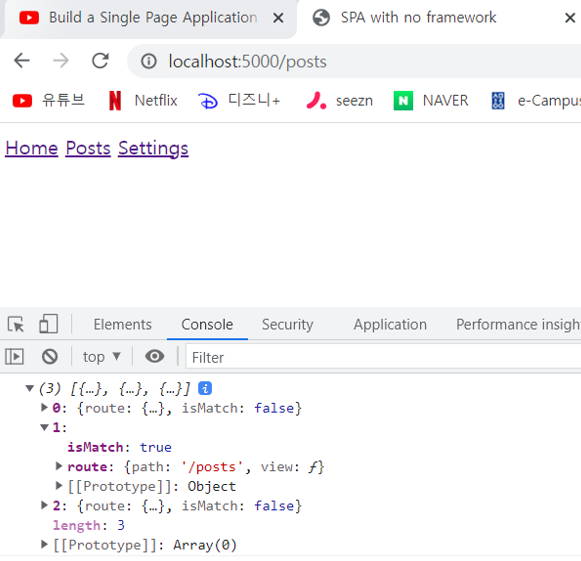
❕ routes 함수 내에서 console.log(potentialMatches);을 한 결과
- 현재 location.pathname에 해당하는 배열의 요소는 isMatch변수에 true가 저장되어있음을 확인 가능
7. router함수 내 변수 match와 조건문 추가
const router = async () => {
  const routes = […];
  const potentialMatches = routes.map((route) => {…});

  // potentialMatches의 결과 중 true인 것을 뽑아 match 변수에 저장
  let match = potentialMatches.find(
    (potentialMatches) => potentialMatches.isMatch
  );

 // match가 true인 것이 존재하지 않는 경우(유효하지 않은 경로)
  if (!match) {
    match = {
      route: routes[0],
      isMatch: true,
    };
  }
};
// document가 load되면 router 함수를 실행시키는 event 추가
document.addEventListener("DOMContentLoaded", () => {
  router();
});
# 변수 match
isMatch가 true인 요소를 저장한다. True인 요소는 현재 location.pathname에 해당하는 요소이다.
# 조건문
match가 true가 아닌 경우는 경로가 유효하지 않은 경우이다.
즉, 사용자가 임의로 입력한 경로가 routes 배열 내 초기화 되지 않은 경우이다.
이때 match를 root path로 정한 routes의 0번째 요소인 "/"로 지정하고 isMatch를 true로 설정해준다.
❕ routes 함수 내에서 “console.log(match);”를 한 결과
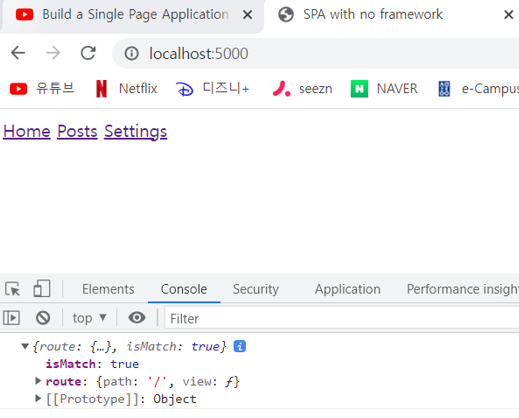
❕ routes 함수 내에서 “console.log(match.route.view());를 한 결과
- match 변수에 저장된 route의 view로 지정해준 함수가 실행되어 console에 나타난다
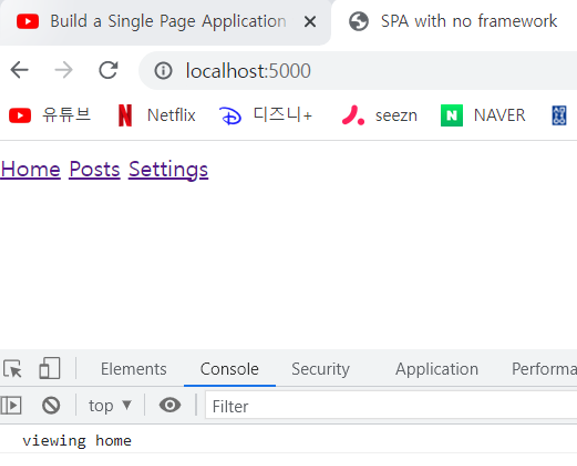
8. 현재 문제점은 home, posts, settings를 눌러 url이 이동될 때마다 페이지가 refresh된다는 것이다. 아래와 같이 코드를 수정하여 refresh를 방지한다.
const navigateTo = (url) => {
  history.pushState(null, null, url);
  router();
};
const router = async () => {…};

// 뒤로가기(popstate)이벤트가 발생하는 경우에도 router함수가 작동하도록 지정해준다.
window.addEventListener("popstate", router);

document.addEventListener("DOMContentLoaded", () => {
  document.body.addEventListener("click", (e) => {
    if (e.target.matches("[data-link]")) {
      e.preventDefault();
      navigateTo(e.target.href);
    }
  });
  router();
});
# document의 body에서 click event가 실행되는 경우
→ 클릭한 target이 ‘data-link’ 속성을 가지고 있다면?
- preventDefault함수를 통해 event의 default action(페이지 refresh 등)을 방지한다.
- target의 href(경로)에 정의된 url을 매개변수로 전달하여 navigateTo 함수를 실행한다.
- navigateTo함수에서는 history.pushState 사용하여 페이지의 refresh없이 주소만 변경해준다.
❕ History.pushState
history.pushState는 페이지 이동 없이 주소만 바꿔준다. (브라우저의 뒤로가가기 버튼이 활성화 된다.)
기본 형태 - history.pushState(state, title, url);
State : 브라우저 이동 시 넘겨줄 데이터 (popstate 에서 받아서 원하는 처리를 해줄 수 있음)
Title : 변경할 브라우저 제목 (변경 원치 않으면 null)
Url : 변경할 주소
+) history.pushState 참고 글 (https://developer.mozilla.org/ko/docs/Web/API/History/pushState)
참고 영상 : https://www.youtube.com/watch?v=WbbAPfDVqfY
'Web > Javascript' 카테고리의 다른 글
| [vanillaJs] 정규표현식을 예시와 함께 알아보자! (0) | 2022.09.02 |
|---|---|
| [vanillaJs] 프레임워크없이 SPA 만들기-2. 라우팅 페이지 구성 (0) | 2022.09.01 |
| [Javascript] JS DOM 이란? (1) | 2022.01.10 |
| [VanillaJS] 그림판 만들기 (0) | 2021.08.12 |
| [VanillaJS] Google Chrome App Momentum 만들기 - 6. 완성 (0) | 2021.08.06 |


