| 일 | 월 | 화 | 수 | 목 | 금 | 토 |
|---|---|---|---|---|---|---|
| 1 | 2 | 3 | ||||
| 4 | 5 | 6 | 7 | 8 | 9 | 10 |
| 11 | 12 | 13 | 14 | 15 | 16 | 17 |
| 18 | 19 | 20 | 21 | 22 | 23 | 24 |
| 25 | 26 | 27 | 28 | 29 | 30 | 31 |
Tags
- 프로그래밍 언어론
- 자바
- Java
- 리액트 훅
- 자바 공부
- react hook
- design pattern
- NextJS
- react firebase
- 데이터모델링과마이닝
- 코틀린
- 프로그래머스 자바
- useEffect
- useState
- codesandbox
- 코딩테스트 고득점 Kit 완전탐색
- 컴퓨터 네트워크
- react
- 프로그래머스
- 코딩테스트 고득점 Kit
- JavaScript
- 프로그래머스 완전탐색
- 자바스크립트
- 디자인 패턴
- 장고
- 백준
- vanillaJS
- React JS
- websocket
- 리액트
Archives
- Today
- Total
기록하는 개발자
[VanillaJS] Google Chrome App Momentum 만들기 - 5. weather 본문
728x90
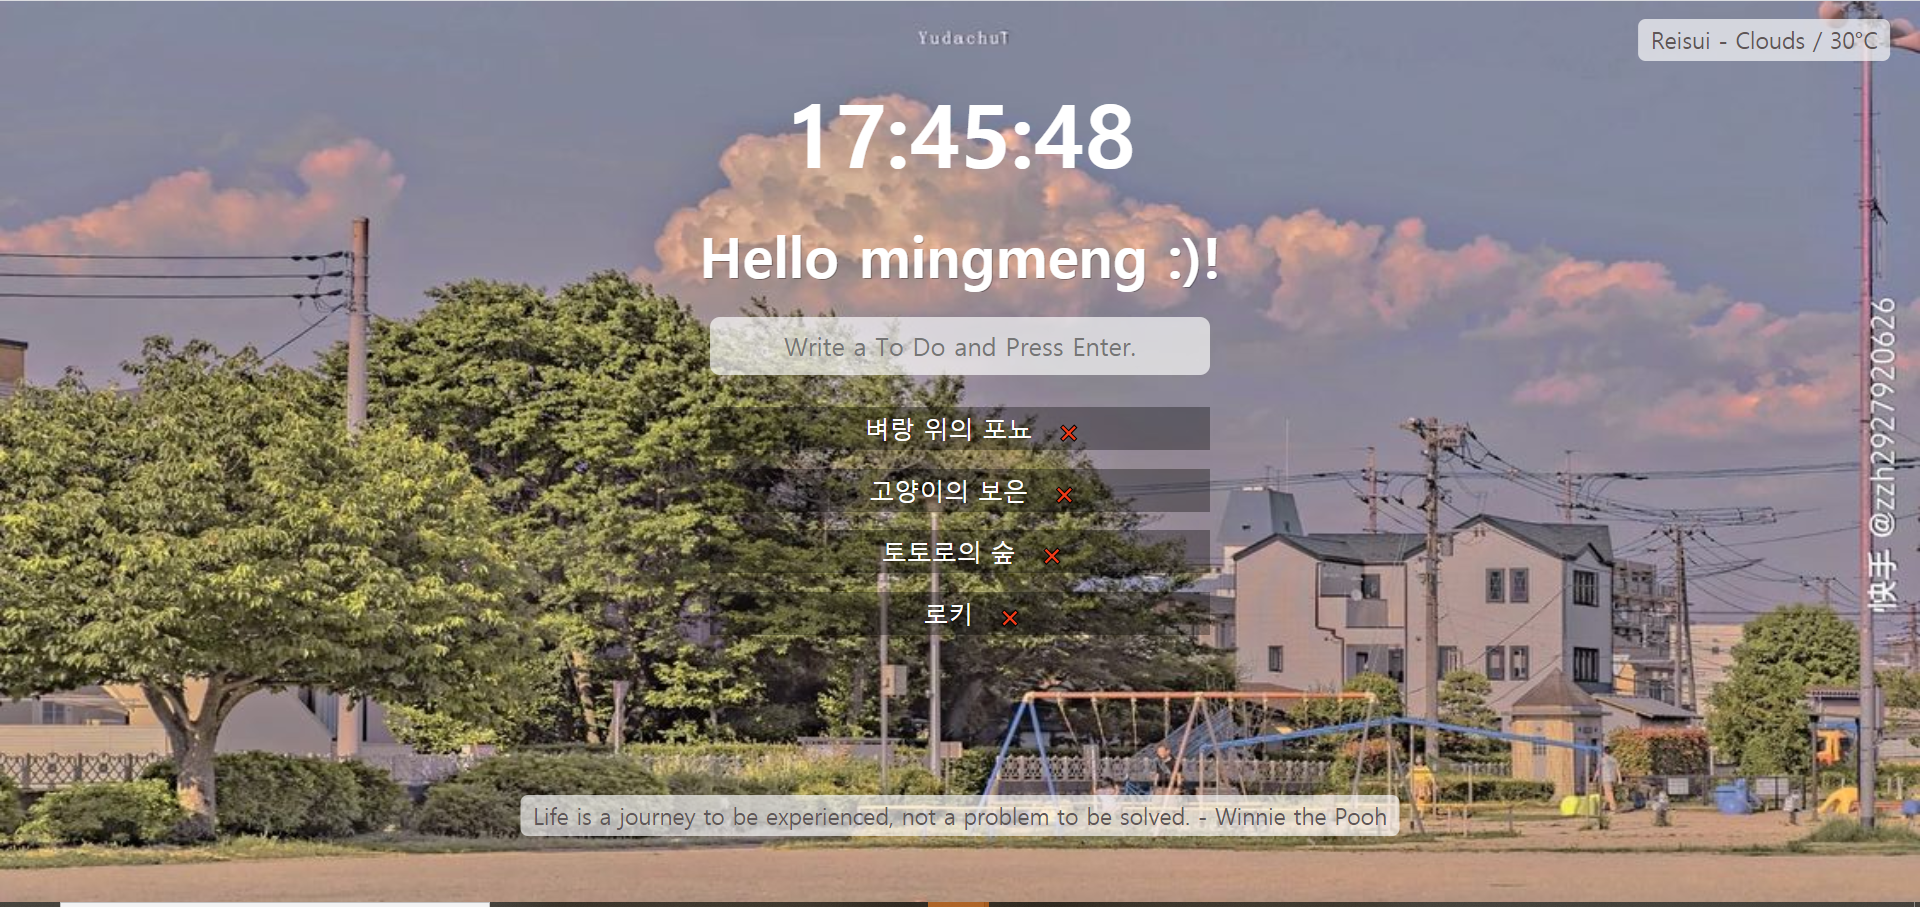
- openweathermap으로부터의 api를 통해 오른쪽 상단에 현재 위치, 날씨, 온도를 띄워준다.

< HTML >
<!DOCTYPE html>
<html lang="en">
<head>
    <meta charset="UTF-8">
    <meta http-equiv="X-UA-Compatible" content="IE=edge">
    <meta name="viewport" content="width=device-width, initial-scale=1.0">
    <link rel="stylesheet", href="css/style.css">
    <title>Momentum</title>
</head>
<body>
    <!--input의 유효성 검사를 작동시키기 위해서는 form 태그를 사용해야한다.-->
    <form class="hidden" id="login-form">
        <input required maxlength="15" type="text" placeholder="What is your name?">
        <button>Log in</button>
    </form>

    <h2 id="clock"> 00:00:00</h2>
    <h1 class="hidden" id="greeting"></h1>

    <form id="todo-form">
        <input required type="text" placeholder="Write a To Do and Press Enter.">
    </form>

    <!--js로 리스트를 추가할 부분-->
    <div class="scroll">
        <div class="scrollBlind">
            <ul id="todo-list"></ul>
        </div>
    </div>

    <div id="quote">
        <span></span>
        <span></span>
    </div>

    <div id=weather>
        <span></span>
        <span></span>
    </div>

    <script src="js/greetings.js"></script>
    <script src="js/clock.js"></script>
    <script src="js/quotes.js"></script>
    <script src="js/background.js"></script>
    <script src="js/todo.js"></script>
    <script src="js/weather.js"></script>
</body>
</html>
< weather.js >
// https://openweathermap.org/ 가입 후 개인 api key를 복사해 API_KEY 변수에 저장
const API_KEY = "4b4a6452c8e528ead6fa2fa823527423";

function onGeoOk(position){
    const lat=position.coords.latitude;
    const lon=position.coords.longitude;
    const url=`https://api.openweathermap.org/data/2.5/weather?lat=${lat}&lon=${lon}&appid=${API_KEY}&units=metric`;

    fetch(url)
    .then((response) => response.json())
    .then((data)=>{
        const city = document.querySelector("#weather span:first-child");
        const weather = document.querySelector("#weather span:last-child");
        city.innerText=data.name;
        weather.innerText=` - ${data.weather[0].main} / ${parseInt(data.main.temp)}°C `;
    });
}

function onGeoError(){
    alert("Can't find you. No weather for you.");
}

navigator.geolocation.getCurrentPosition(onGeoOk,onGeoError);
getCurrentPosition(argu1, argu2);
argu1 : successCallback 함수
argu2 : errorCallback 함수
onGeoOk 함수 : successCallback
- geolocation.getCurrentPosition() 함수를 통해 parameter로 position을 받아온다.
- 위도, 경도를 각각 변수에 저장해주고 복사한 api의 lat, lon, appid에 각각 위도, 경도, API_KEY를 넣어준다.
- fetch(url)을 이용해 api의 url을 실행한다.
fetch - 1.api로부터 reponse 객체를 받아온다.
fetch(url)
  .then((response) => ···);
fetch - 2. json() 함수를 호출하여 response 객체를 js 객체로 변환한다.
*json() 메서드를 호출하면, 응답(response) 객체로부터 JSON 포맷의 응답 전문을 자바스크립트 객체로 변환하여 얻을 수 있다.
fetch(url)
  .then((response) => response.json());
fetch - 3. js 객체로 변환한 reponse 객체로부터 필요한 정보(data)를 받아온다.
- city, weather변수를 만들고 innerText를 지정해준다.
fetch(url)
    .then((response) => response.json())
    .then((data)=>{
        const city = document.querySelector("#weather span:first-child");
        const weather = document.querySelector("#weather span:last-child");
        city.innerText=data.name;
        weather.innerText=` - ${data.weather[0].main} / ${parseInt(data.main.temp)}°C `;
    });
fetch() 함수 자세히 알아보기 : https://www.daleseo.com/js-window-fetch/
[자바스크립트] fetch() 함수로 API 호출하기
Engineering Blog by Dale Seo
www.daleseo.com
onGeoError 함수 : errorCallback
function onGeoError(){
    alert("Can't find you. No weather for you.");
}
- 사용자를 찾을 수 없다는 경고 문구를 넣어준다.
728x90
'Web > Javascript' 카테고리의 다른 글
| [VanillaJS] 그림판 만들기 (0) | 2021.08.12 |
|---|---|
| [VanillaJS] Google Chrome App Momentum 만들기 - 6. 완성 (0) | 2021.08.06 |
| [VanillaJS] Google Chrome App Momentum 만들기 - 4-2. Checklist Delete (0) | 2021.08.05 |
| [VanillaJS] Google Chrome App Momentum 만들기 - 4-1. Checklist Load (0) | 2021.08.04 |
| [VanillaJS] Google Chrome App Momentum 만들기 - 3-2. Random Background Image (0) | 2021.08.03 |


